
Do you want to edit photos in CapCut? Generally, we use many photo editors for editing our images. Some are simple and some are complex. Edit Photos in CapCut is so easy even for beginners. Users want to use it for editing our images smoothly and perfectly like editing videos. CapCut makes your images more colorful and increases the quality of your images. In this article, we will talk about how to edit photos in CapCut.

Table of Contents
Why use a CapCut app for photo editing?
Edit photos in CapCut are used for different tasks. It was designed basically for video editing but we can use it for editing photos. It provides multiple basic photo editing tools and image customization features like allocated photo editing software. Many video editors who can produce high-quality results also expect to be able to edit photos. It is considered a convenient photo editing alternative. However, if you want to apply powerful animations to your photos, then you can use the Power by Armor CapCut Template which is the most trending template nowadays.
How to edit photos in CapCut?
Edit photos in CapCut is as easy as editing a video. There is no need to be confused about editing photos and to know about how to put picture in video CapCut. You can do every step very smoothly and perfectly. These are the things that you do with your images. For of all, You must have CapCut on your device, therefore, install the updated version of CapCut on your device to edit photos in CapCut.
Retouch
CapCut also has a retouch option that allows you to apply CapCut photo effects to make your photos more attractive. It improves the looks of the objects while to edit photos in CapCut. It offers a variety of retouching features including face whitening, improving the shape of the face, skin smoothing, teeth whitening, and eye brightening. With these exciting features you can achieve your desired face and body look. This is currently available for mobile devices to edit photos in CapCut.
1) Face: CapCut provides many tools for reshaping face features. You can reshape your eyes, nose, mouth, and eyebrows. You can change the size of every feature by changing the sliders. However, you can also apply makeup on your face. In this way, you can incredibly edit photos in CapCut.
2) Body: You can reshape by auto and manually. You can reshape your legs, waist, head, and brighten your skin.
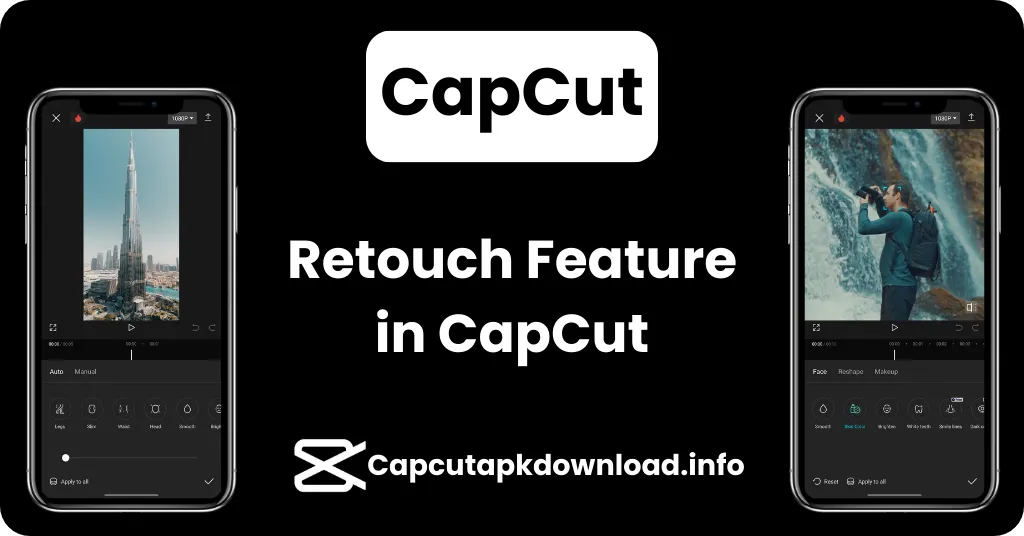
Image Colour Setting
Everyone in image editing, the pictures taken with a camera, practices the adjustment options. CapCut image effect different adjustment parameters like brightness, contrast, saturation, exposures, hue, sharpening, and other extra options.
CapCut provides many coloring options to make your photos more vivid and glowing. Color types like Hsl, and RGB are present to enhance and reduce the color balance. So if you have any lightning problems and other color errors in the image you can do truly with CapCut.
You can see these color settings options below in CapCut and guidelines about how to use CapCut to edit pictures.
1) Brightness and Contrast: You feel mostly uncomfortable when the picture looks too dark and overly bright. You can uniform their lighting balance by contrast and brightness.
2) Saturation: If you want to make your pictures more vivid you can use saturation setting. This works best on those images of closed objects like food pictures.
3) Exposure: This works like brightness and contrast but it controls brightness and contrast at different ranges. CapCut make all photos same length, gives a shadow, and atmospheric look.
4) Color Grading: It is a setting for all colors. It is a curve that increases or decreases changes overall colors and gives a specific color look at different scales.
5) RGB Levels: it is the combination of three colour levels red, green, and blue. It can be adjusted by numeric values of your color. For example, if your image looks warm and gives more yellow colors you can reduce yellow levels to normal and it gives a natural color look to edit photos in CapCut.
6) HSL: it is another color model with three components hue, saturation, and lightness. It is a color key and purely adjusts the colors. Hue changes the color and saturation changes the intensity of color. Suppose you are adjusting the natural shine of skin tone color you can pick smooth colors and increase their intensity by saturation.
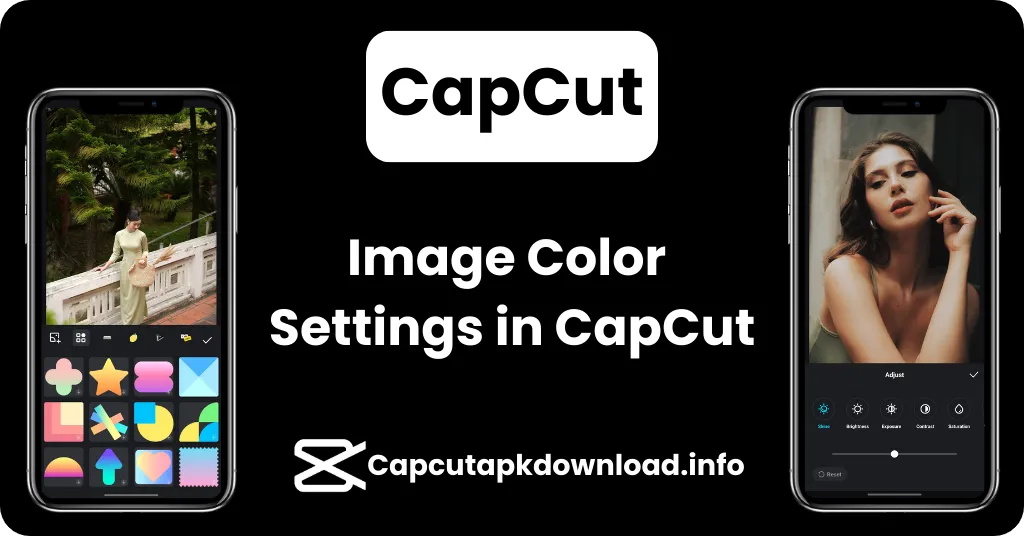
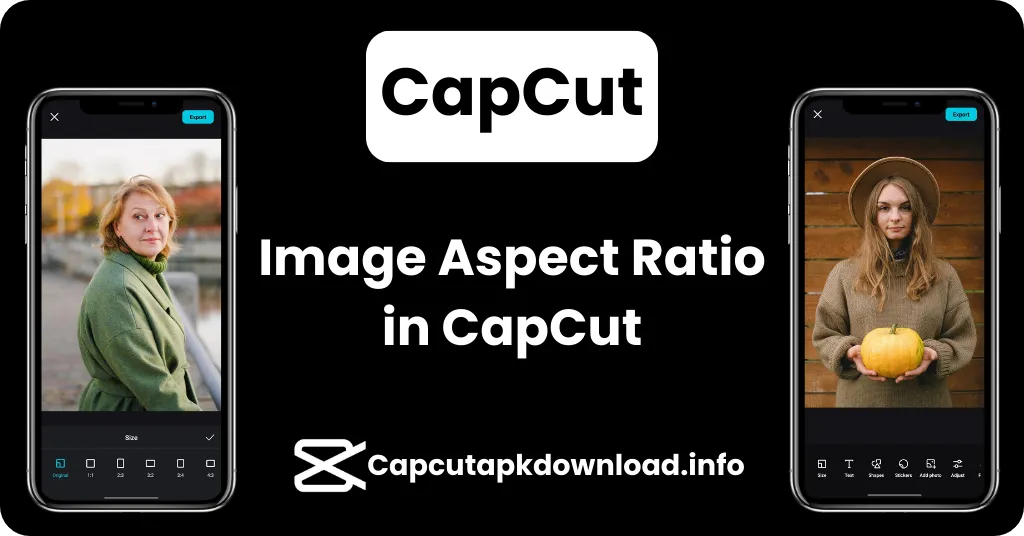
Image aspect ratio
In CapCut you can transform the size of your images even videos. If you are uploading videos for different platforms there are different aspect ratios for different platforms.CapCut provides all the size ratios for different types of platforms like 1:1 to 16:9. If you don’t maintain the exact aspect ratio it causes contortion in the photo. CapCut makes it easy to decide the size by showing the platform logo on every size. In this way, the user cannot be confused about which size he chooses. Here are the aspect ratios in CapCut.
1) 9:16: this ratio is provided by CapCut for making footage for the TikTok platform for mobile devices. However, if you are making Snapchat stories this is the appropriate size.
2) 1:1: CapCut also serves size for making Instagram stories and reels This is a square size and most social media profiles are also in this size.
3) 16:9: if you are making videos for YouTube you can use the formats. However, this size is also best for making web images.CapCut shows this size with the YouTube logo.
4) 4:3: it is a full-screen size and mostly this size is used for playing videos on older devices.
5) 2.35:1: CapCut also supports making videos for movie-type content. If you are focusing on cinematic-type videos, choose this size.
Add Shapes
CapCut provides graphic shapes to use for creating infographics and diagrams when you edit photos in CapCut. Shapes, such as rectangles, circles, arrows, or lines are also present. CapCut helps to change the shapes, and their size and provides all features to manipulate. If you are an affiliate product writer you can make their images in CapCut with the help of shapes to highlight the product features. It includes basic shapes, arrows and lines, frames, boxes, and symbols.
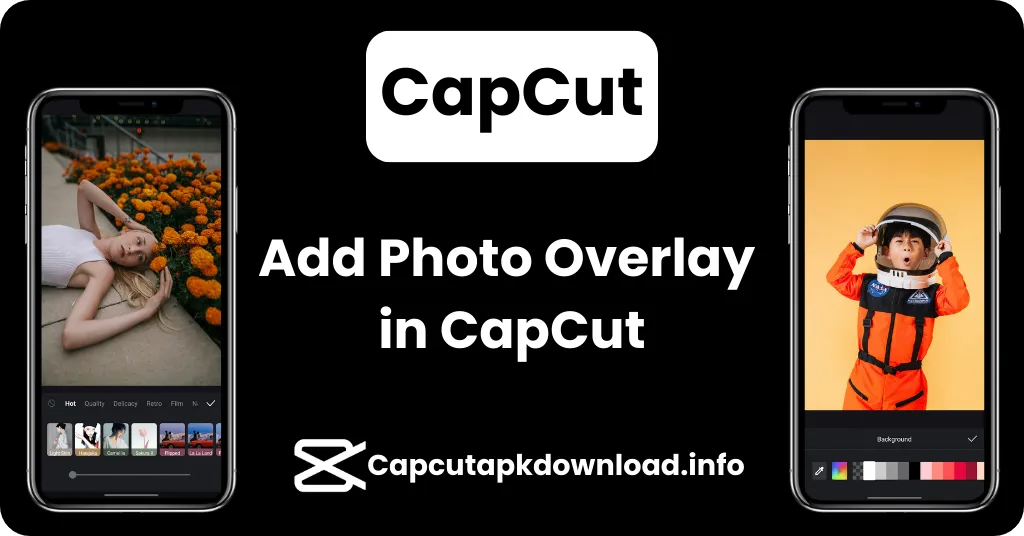
Add photo overlay
When you edit photos in CapCut, you can use the photo overlay option in CapCut. If you are a graphic designer who wants to add a separate logo in your image you can use photo overlays. This is hard to do in complex editing software. You can use different PNG images in another image. Here are some elements to know that how to add photos in CapCut.
1) Logos: you can add a separate watermark to your photo. If you are a photographer you can use your logo as a branding in images.
2) Stickers and emojis: if you want to make your content more entertaining you can add emojis and stickers.
3) Text: CapCut offers a wide range of text overlays, including headings, subheadings, and body text, to add informative or decorative text to your images.
4) Backgrounds: In background overlay, you can add any color and image to the existing background. Suppose you are making a thumbnail you can image and full background color as an overlay on text. You can adjust the transparency by adjusting opacity.
How to avoid common photo editing mistakes
There are many small mistakes we make when you edit photos in CapCut. We want to style our images and in styling, we do not focus on other things. In this way, it gives a drastic unreal look.
Hurry up editing
Time is important, but it doesn’t mean you should hurry up when editing photos. Editing is a process that takes patience and time. If you rush, you won’t be able to show your creativity. You won’t be able to understand the process and will make mistakes. You won’t be able to find the true angle. Take your time and experiment with different things to edit photos in CapCut.
Forgetting backup
We mostly forget to make a backup photo when editing. CapCut makes a clone of your photo but you should make a copy of the original photo. In case it is lost due to any reason. Another benefit is that you compare both photos at the same time.
Color gap
The gaps in the colors look so unnatural because you make a false adjustment. This problem is mostly caused when using any presets in the photo. The colors from one side look different and the other looks different. So you analyze the situation and use a color slider to balance the colors. CapCut has a large color stuff, so use it to appropriate the color correction.
Not using online tutorials for editing
Many new editors start editing without learning the tools. They use the tools without knowing how to use them. So, if you don’t have much knowledge about using CapCut, learn from online tutorials and read articles about the CapCut features.
Neglecting aspect ratio
The aspect ratio is important to avoid the distortion in screen. Mostly we change the aspect ratio when saving your photo.CapCut has multiple aspect ratio options to save your photo for different platforms. correct the orientation of your photos when they were captured in portrait mode but need to be displayed in landscape mode.
Note: If you think that how to save edits on CapCut or you want to export your edit photos to your mobile devices, just hit on the “Export” Button and navigate to the exporting timelines. Just wait for its processing and click on the “Done” button.
Pros and Cons:
It is essential to understand CapCut’s strengths and weaknesses in photo editing to optimize its use for your needs. Here are the good and bad of CapCut when you edit photos in CapCut.
Pros
- Improve image quality
- Simple interface
- Good for basic editing
Cons
- Generic look
- Not wide features like Adobe Photoshop and picsart.
Watch the “Video tutorial” below to follow the steps mentioned above to edit photos in CapCut.
FAQs
Q: Can CapCut be used for editing photos?
A: Yes, CapCut has photo editing abilities. It is also used for editing photos.
Q: Does CapCut provide retouch features for photo editing?
A: Yes, it supports retouch. CapCut offers skin smoothing, acne removal, and face and body reshaping features.
Q: Can I change the background of the photo in CapCut?
A: Yes, you can remove and replace the background of images in CapCut.
Q: Does CapCut Save your Videos in different video formats?
A: Yes, CapCut allows you to save your videos in different formats including, 480p, 760p, 1080p, 2k/4k resolution.
Conclusion
You can edit photos in CapCut in a unique way. You can modify your picture in CapCut with a few clicks. CapCut’s photo editing is precise, it makes your photos interesting. The users love the photo editing features. These editing features are free in CapCut and it doesn’t charge a single penny from your pocket. Those people who don’t want to learn complex editing software like Adobe Photoshop, Lightroom, or Picsart. It’s easy to use and has all the features you need to edit your photos like a pro to edit photos in CapCut.