
Are your pictures so blurry and do you want to enhance image resolution in CapCut? We have also faced the same problem for a long time we took a lot of pictures but in the end, we were depressed to see the quality of our pictures. Finally, we have a top-class method to enhance image resolution in CapCut. If you also want to learn how you can enhance image resolution in CapCut then stay with us. We will guide you step by step all the process and which tools and options are used to enhance image resolution in CapCut.
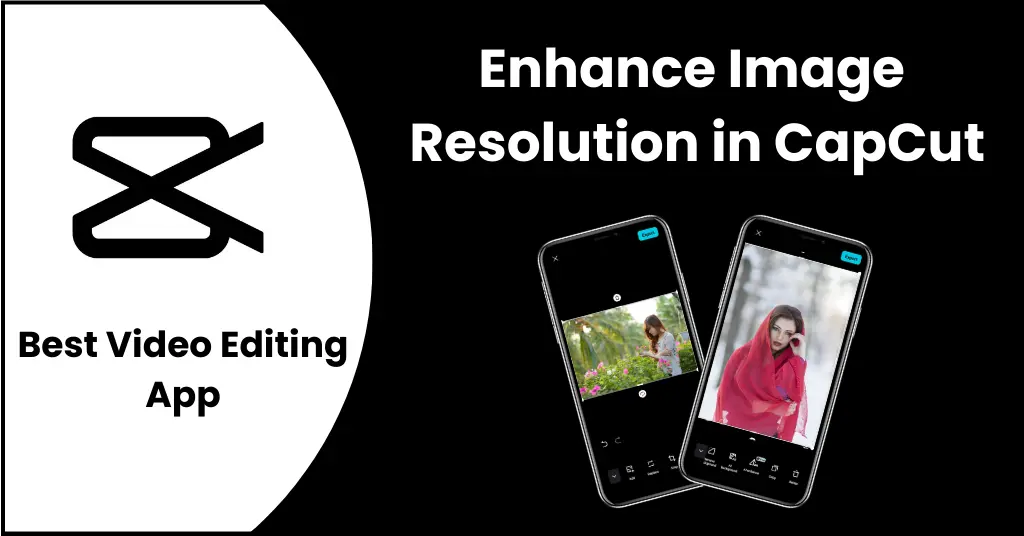
Table of Contents
- 1 What is an image resolution enhancer?
- 2 Why enhance image resolution in CapCut?
- 3 Key features of AI Enhnnce in CapCut
- 4 How to enhance image resolution in CapCut?
- 4.1 Step-1: Install and Open CapCut
- 4.2 Step-2: Expand and Find AI enhance option
- 4.3 Step-3: Go to AI enhance menu
- 4.4 Step-4: Add your image
- 4.5 Step-5: Turn on the AI enhance option
- 4.6 Step-6: Remove background
- 4.7 Step-7: Use AI background
- 4.8 Step-8: Crop your image
- 4.9 Step-9: Add two photos in a single image
- 4.10 Step-10: Remove the background of the second image
- 4.11 Step-11: Export your image
- 5 Tips for using AI Enhance in CapCut
- 6 Pros
- 7 Cons
- 8 FAQs
- 9 Conclusion
What is an image resolution enhancer?
Image resolution enhancer is a feature that is provided by several video editing apps and websites. It is used to enhance the resolution and quality of your pictures could be more attractive and will catch more and more audiences your pictures. When your image quality is higher then it could be a plus point to keep the viewers on your pictures. These pictures can be of any type including your selfies, YouTube video’s thumbnails, and can be of your post for a website or any social media platform.
Why enhance image resolution in CapCut?
We are living in the Artificial intelligence (AI) world where any type of problem can be solved by AI. Therefore, every application and website focuses on this trending feature. You will love to know that now CapCut has multiple features that work based on AI. CapCut allows you to enhance image resolution without paying any extra fee which is the specialty of it. Moreover, it also allows you to add text, change the background with the help of AI, add AI captions, and many more features. Therefore, we recommend you that always enhance image resolution in CapCut. Moreover, if you want to edit your photos, you can also do this by using the CapCut.
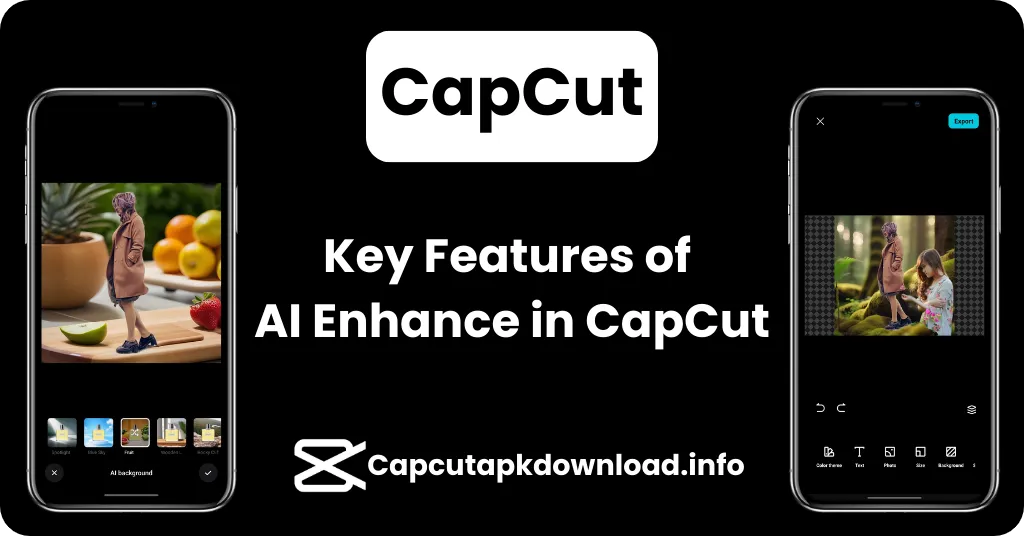
Key features of AI Enhnnce in CapCut
Enhance image resolution in CapCut is the latest feature of CapCut which is offered in its latest update which is no doubt an incredible feature. Here, we explain some outstanding features of the AI enhancement option in CapCut.
AI background
If you don’t have your background to fit as background for your photos then you can use CapCut for this purpose. CapCut provides you with a lot of AI backgrounds in its latest update. It has almost all types of backgrounds including flowery, golden, spotlight, blurry, romantic, rocky, city, snow, wild, and many more.
Important Note: You can’t add AI backgrounds to portraits.
Color Correction
Color correction is a key feature in improving the quality of photos in the CapCut. CapCut allows you to adjust the color correction while enhancing the image resolution. It will help you to improve the photo’s mood and atmosphere while enhancing the image resolution in the CapCut.
Remove background
CapCut is the only video editing application that allows to removal of the background of a specific image without any charges. It is an incredible feature of the CapCut. Most of the time, your images are so good but don’t like your photo’s background and want to remove it permanently then you can avail of this feature by accessing the up-to-date version of CapCut.
Replacement of images
If you have uploaded a wrong image in the editing timelines of CapCut, you don’t need to go back to the main menu of the CapCut. Just use the replace option of the CapCut and choose another picture on which you want to enhance image resolution in CapCut. Due to this feature, you can save much time and can edit your photo more easily.
Auto enhancement
It is a wonderful feature of CapCut that allows you to improve the photo’s resolution. Manually enhancing of photo’s resolution may be difficult and may give a generic look to your photos. Therefore, CapCut provides auto-enhancement that will be easy and super cool for all types of images.
Time-saving
Although multiple applications are proving the image enhancing features but most of them are paid or it may allow few images to enhance the image resolution. However, CapCut is the only one that allows you to enhance image resolution in CapCut for free and has no limit to use. Moreover, CapCut has AI enhancement feature that is fully automatic which in results saves much time for and gives you incredible results.
How to enhance image resolution in CapCut?
To enhance image resolution in CapCut is not a big challenge. You can easily enhance image resolution in CapCut just by following these guidelines.
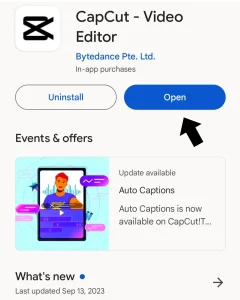
Step-1: Install and Open CapCut
- First of all, you must have CapCut on your device.
- Install the latest version of the CapCut app and open it.
Step-2: Expand and Find AI enhance option
- Find the “AI enhance” option in your CapCut main menu.
- It is located just above the new project button.
- If not available then tap on the Expand button and now it will be visible for you.
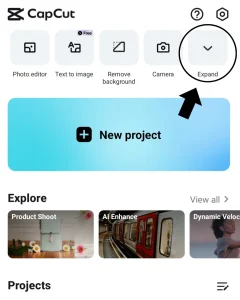
- When you have found out the AI-enhanced menu. Just tap on it.
- Here, your device gallery will open in front of you.

Step-4: Add your image
- Select your favorite image of which resolution you want to increase.
- Add it to the CapCut timeline just click on the “Add” button located at the bottom right corner of the screen.

Step-5: Turn on the AI enhance option
- Select the photo and scroll left to the bottom menu bar.
- Find the AI enhance option and tap on it just to turn on it.

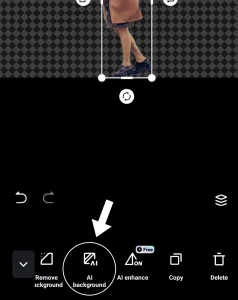
Step-6: Remove background
- If you want to remove or change the background of your picture then tap on the remove background option.
- It is available in the same menu bar at the bottom of your screen.

Step-7: Use AI background
- You can apply your favorite image background which you love the most.
- However, CapCut also gives you a wide range of AI backgrounds which can be helpful to make your images more attractive.
- For this, just click on the “AI background” menu.
Step-8: Crop your image
- If your image size is high and want to resize your image then CapCut also allows you to do this.
- Select your image and click on the “crop” option.

Step-9: Add two photos in a single image
- If you want to add a second photo to your first image and want it to look like a single and original image then you can also do this.
- Go to the “Add” option and add the second image to the first image.

Step-10: Remove the background of the second image
- Select the second image in the CapCut’s timeline.
- Remove its background just by clicking on the “remove background” option.

Step-11: Export your image
- Finally, you have all done successfully. Now you can save your image to your device gallery.
- Tap on the export “↑” button available at the top right corner of the screen.

Tips for using AI Enhance in CapCut
Don’t use portrait images
CapCut doesn’t allow portrait images while using AI backgrounds. One of the biggest reasons behind this is that when you use portrait pictures and apply an AI background, at that point CapCut will automatically zoom in and change the background. On the other hand, if you use the other formats of the image then it will allow you because it can affect the perfection of the CapCut.
Keep it simple
It is a pro tip while doing video/photo editing in CapCut. It is a key factor of video/photo editing that your editing should be minimal and keep it as simple as you can. Because over-customization can also affect your photo quality which will indirectly detract your audience. Therefore, keep it simple and unique as much as you can.
Use original settings of AI enhance
You can customize the image settings according to your needs. It could be more attractive and mind-blowing settings. But the recommended settings are the original/default settings. We said this because it will enable attractive customization and also will make your file super light with high-quality enhancement.
Pros and Cons
Enhance image resolution in CapCut has a wide range of benefits but it has also some bad effects such as:
Pros
- User-friendly interface.
- Improve video quality.
- Easy to use and free for all.
- Multiple customization options
Cons
- Can take more time.
- Availability of internet.
FAQs
Q: Can I enhance image resolution in CapCut for free?
A: Yes, all the features of CapCut including image resolution enhancement are free to use for all.
Q: Can I enhance image resolution in CapCut without the internet?
A: No, you can’t enhance your image resolution without the internet because it is an online feature of CapCut.
Q: Does CapCut have an AI image enhancer?
A: Yes, CapCut provides an AI image enhancer to improve your image resolution without paying any extra charges.
Conclusion
Enhance image resolution in CapCut is so easy that even a beginner can easily use this feature. You can easily increase your image resolution within a few moments, remove backgrounds, and add AI backgrounds. Due to its user-friendly interface, its popularity has increased day by day, therefore, we always recommend you use CapCut to enhance the photo resolution.